Portable CMM, Dimensional Measurement Software Increase Precision at TKA-Waupaca
Six automatic molding machines at TKA-Waupaca Foundry Co. in Waupaca, WI, are a testament to that foundry’s drive for precision manufacturing. Its gray-iron castings— used in brake rotors and drums, transmission housings, hydraulic pump housings, flywheels, intake and exhaust manifolds, cylinder heads, crankshafts, and many other products — offer some of the most precise dimensional tolerances achieved anywhere.
“Precision” is a concept that TKA-Waupaca takes seriously, particularly in regard to inspection measurements that are calibrated within 0.002 -0.003 in. To achieve this, Plant 1’s Layout Department uses a portable coordinate measuring machine from Romer Inc./CimCore and PowerInspect dimensional-inspection software from Delcan Inc. Inspection teams there offer several reasons why they work to those levels of precision:
• Customers have automated the machining of castings they get from TKA-Waupaca, so many of those operations have no machinists to adjust tool offsets or tweak N/C programs. Without those adjustments, very little part-to-part variability can be accommodated in machining.
• Many parts are used by customers as-cast, with little to no machining.
• Tight tolerances reduce the time castings spend in the grinding operations. This speeds deliveries and saves labor.
• All dimensional inspections of molds are measured from known reference points on the molding machines. This ensures that every mold’s ram and swing halves fit together exactly. It also ensures that every mold is properly positioned and aligned on the conveyor that carries it to the pouring area. Alignment for pouring controls what had been a significant cause of variability among castings in a job lot.
It is not enough to ensure that the molds are dimensionally correct, i.e., measured only in reference to the individual mold’s coordinates. Instead, the precision demanded by TKA-Waupaca’s customers requires that molds be checked against the tooling that produces them.
If only the molds are measured, some tolerance errors might cancel each other. Dimensional errors would still exist, but they may be harder to find. More important, the errors would be harder to trace to root causes in the molding and core-setting machines, such as ram or swing arm maladjustments or bushing wear.
This can be done only by verifying that the pattern is pressed into the sand correctly as each mold iduced, and that the core-setting machines are running correctly. Once dimensional relationships are established among patterns, cores, and key components of the automatic molding machines, molds can be checked by referring to known points on the molding machines. This adds to the need for precision, because in linear measurements tolerances stack up.
If molds and cores are removed from the production line and carried to a conventional CMM, there is no verifiable way to address problems that occur within the molding machines or core-setters themselves. Symptoms can be identified, but that’s all. Once a mold or core’s dimensional relationships to the machinery that produced it are cut off, there is no straightforward way to translate some of the dimensional discrepancies into actions to be taken by tooling maintenance people.
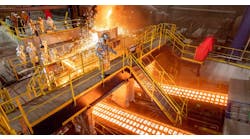
These are the reasons TKA-Waupaca engineers, tooling experts, and machinery maintenance people do most of their dimensional measuring with a portable CMM between the automatic molding machines and the ladles. It’s one of the hottest, noisiest, and most confined areas of the foundry.
TKA-Waupaca is a high-volume operation, so it’s a fast-paced one. Each of its six automated molding machines makes about 300 molds per hour, i.e., five or six molds per minute. That works out to a new mold every 10 or 12 seconds per machine. Anywhere from one to six parts are produced per mold. Job lots are always more than 100 pieces.
“Customers’ demands pushed us to use the portable CMM and PowerInspect,” according to Steve Buck, layout engineer. He’s the primary user of the Romer-PowerInspect system. “Customers insist that we maintain a tight control over the way the patterns are pressed into the sand in the molding machines. When we are looking for root causes, we go all the way back to the pattern that makes the impression, and start measuring from there.
“We also have to make sure that cores are set correctly, that no core shifts occur, and that there is no shifting between ram and swing halves of the mold,” he adds.
“It is only the portability of the Romer arm that allows us to do this, to check molds against the molding machine itself,” Buck continues. “That could never be done with conventional fixed CMM because the inspections always have to be referenced back to the molders. We have to work to common zero-points on the machines, and not just to the mold.”
TKA-Waupaca’s customers appreciate another aspect of this equipment. “PowerInspect allows us to generate complete, reports to the customers for verification of inspections on production, sample, and first-time castings,” Buck added. “Once the point data has been electronically downloaded into a template, all the statistical process control and trending functions are available to us.”
Delcam’s automated report generator is being used to create initial sample inspection reports (ISIRs) for Caterpillar, one of Waupaca’s most important customers. “We designed the PowerInspect report to look just like the forms that Cat requires,” Buck says. “This saves us a huge amount of time; before, we had to enter the data manually. This also eliminates a potential source of error since the inspection report data is downloaded right into each ISIR.”
“Our in-house troubleshooting is helpful for preventive maintenance,” Buck notes. “This includes identifying things like wear in bearings and bushings before they begin to cause ‘slop’ in the equipment, and finding inaccuracies in pattern setting and out-of-tolerance molds.”
Among the system’s many tasks are assisting the Maintenance Dept. to set up the molders, ensuring that molds are square, that they do not shift, and that they remain aligned when they come out of the molding chamber. TKA-Waupaca often measures a mold’s parallelism and perpendicularity as it comes out of the machine, right before the molten iron is poured in to it. “Sometimes we even have to measure inside the machines for the pattern positioning and orientation relative to the machine’s ram and swing arm,” Buck says.
The 9-ft Romer Model 3000i arm is in constant use. “To get the best measurements in and around the molding machines, we clamp the arm as close as possible to the machine’s swing arm and its actuating cylinders — sometimes right to the bed plate of the machine,” he notes.
The old, Bendix Portage manual inspection machines, are used much less now. “The portability makes it possible to check virtually anything, both in the layout shop and out in the plant,” Buck continued. In other words, measurement and dimensional verification has moved almost completely to the production floor. Instead of the slow and somewhat artificial conditions in the CMM room, measurement is flexible, intuitive, and responsive.
The portable CMM is durable, too. “The arm is often used within 10 or 15 feet of the ladle full of molten iron, which is over 2,600°F,” he notes. “When measurements are carried out during production, we sometimes get even closer.
“We keep measuring even with the hot iron going by. It’s a good thing that Romer made the arm out of a carbon-fiber composite. We know it will be dimensionally stable no matter how close we get to those ladles,” Buck points out “The system is impervious to foundry dust, too, and it’s unaffected by the slight vibration from the molding machines.”
The choice of the Romer/CimCore-Delcam measurement package was based on its functionality outside of the layout room. “We needed to be able to check the automatic molders while they are making molds, to be able to take the Layout Dept. to the areas that need things checked during production,” Buck says.
The Romer/CimCore arm and PowerInspect are used in the pattern shop, too, to check cores, core boxes, and patterns. This is much faster than the earlier practice of bringing them into the layout department, where the conventional CMM sits. One reason for the speed is that core boxes and patterns are heavy, awkward, and sandy, or dusty. Engineering changes are measured with and without CAD.
The Romer PowerInspect system was “an easy choice” for other reasons, too. Buck cites: The ability to change probes on the fly without recalibrating the arm; better measuring tolerances; and the arm’s lightweight, counter-balanced design. “In this day and age of ergonomic considerations, it’s very easy to operate, even during lengthy and complex series of measurements.”
Background details
TKA-Waupaca Foundry Co. operates six plants, four in Wisconsin, one in Indiana, and one in Tennessee. The 178,000-ft2 Waupaca, WI, plant has a capability to produce 125,000 tons/year of finished castings, weighing 3.5 to 125 lbs. Its melting equipment includes an 84-in. diam. cupola; two 40-ton vertical-channel holding furnaces; and six automatic bottom-pour, stopper-rod ladles. Its six automated molding machines are horizontal flaskless units, sized as follows:
- Two 28 3 34 in. (or 710 3 865 mm.)
- Three 22 3 34 in. (or 560 3 865 mm.)
- One 20 3 26 in. (or 505 3 650 mm.)
TKA-Waupaca also has six automatic coresetters for weights from 2 oz. to 50 lbs.
TKA-Waupaca runs Delcam PowerInspect on the WindowsNT operating system with Service Pack 5. The hardware is a Dell Latitude CP laptop computer with an Intel Corp. Pentium III CPU.


