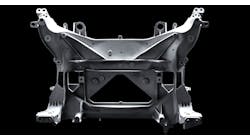
Rochester Metal Products was established 75 years ago to supply cast parts for lawnmower production, and today it produces up to 50,000 tons/year of gray and ductile iron castings for manufacturers involved in railroad, heavy truck, construction, and agricultural machinery manufacturing. Although approximately 30% of the business supports automotive suppliers, the customer base is diversified: the largest customer accounts for just 11% of sales.
The 200,000-ft2 foundry pours castings ranging in size from 0.75 to 50 lb. Rochester Metal supplies Class 25, Class 30 and Class 35 gray iron in volumes that exceed 70 tons of saleable castings per day, and it supplies 65/45/12 as-cast, 80/55/06 ascast, and 60/40/18 heat-treated ductile iron in volumes that top 166 tons of saleable casting per day.
The operation also offers design-engineering help for new product development, from original concept to prototyping and final production. The company is vocal about its focus on customer service and equally committed to quality assurance backed by the use of state-of-the-art measurement solutions.
Metrology in sight
Rochester Metal is an the ISO9001:2008-certified company that has demonstrated a willingness to invest in technologies that add value to its products. During the 1990s, it purchased a bridge coordinate measuring machine (CMM) to support quality inspections. Though primarily a first-stage foundry — its products are rarely used as finished products — its castings meet ±0.03 in. (0.8 mm) tolerances, to reduce customers’ machined scrap.
About 10 years ago, RMP purchased a portable CMM (PCMM) articulating arm that added versatility to inspection processes, but also allowed the inspectors to compare results to a product’s nominal CAD model. Over time, the flexibility of the PCMM made it the primary method for layouts, and the bridge CMM became a backup unit.
The PCMM was used primarily to verify sample castings for RMP’s customers — or for Production Part Approval Processes (PPAPs). This could be timeconsuming, depending upon the number of data points to be checked using manual hard probe touches: Some customers identify more than 130 checkpoints on their more complex parts. Rochester Metal began to look for new alternatives that would improve its rate of throughput.
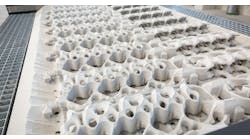
The foundry wanted to learn more about laser scanning for CMM. Output generated from laser scanning creates a three-dimensional model, or “point cloud,” of an object’s surface. The dense coverage of data (potentially millions of individual points) creates the point cloud, and those results are compared against nominal CAD values. During CADto- part comparison, large point clouds are overlaid on the CAD model for fast visual inspection of deviations. The result is sometimes described as a “color map.” Surfaces that are especially complex with lots of curvature and difficultto- access features benefit the most from laser scanning.
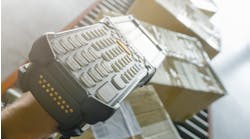
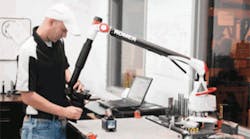
A little more than a year ago, Rochester Metal invested in a Romer Absolute Arm with a factorycalibrated, integrated laser scanner, expecting to improve the data-collection and inspection process. Instead of manually collecting the individual points, the scanner is passed over the part almost as though the operator were “painting” it, as described by a supplier source. Making scans at different angles ensures that all the relevant geometry is captured. After scanning, the foundry’s Layout department will overlay the point cloud with the CAD model to see if the part has diverged from the original design intent. Also, because all the inspection data must be traceable back to the NIST standards, the length standard and calibration sphere included with the Romer portable CMM guarantee the laser’s accuracy.
The process time saved after adopting non-contact scanning was an immediate benefit to the foundry. Formerly, if an operator needed to collect data points manually, he had to figure out how to fixture the part. Now, he simply sets the casting on a table and begins scanning. There are no concerns about the part moving, which would have required him to start over, and the whole process proceeds more quickly. This speed is particularly apparent when Rochester Metal Products produces sample molds for a new pattern. Once the Layout department verifies all measurements are correct according to the CAD reference, the Engineering department is notified that the tool build has been successful and the PPAP proceeds. This process may have taken up to a week by manual inspection; with the laser scanning capability it takes approximately one or two days.
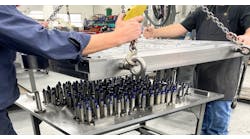
Another way that the arm demonstrates its value involves Rochester Metal’s wear review rack. To get an accurate baseline when a new pattern arrives, the Layout department will measure the first castings produced off the new tool, to obtain a permanent record of its original state. After a determined number of molds have been poured, castings are sent to the wear review rack to be re-measured for consistency, and the results are compared against the original data. This process shows where sand has been wearing away from the pattern, and whether or not the parts remain within the tolerances since the initial run. If the castings show wear, Rochester Metal Products will notify its customer to make a decision to repair or replace the pattern.
Wear reviews had been inclined to backup when data points were collected manually; today, the reviews are conducted as orders are produced, providing instant feedback on product and process quality.
Worth a thousand words
With laser scanning capability, Rochester Metal Products does not simply report on the highs and lows of a few dimensions as compared to the CAD model; it can deliver a comprehensive assessment of a casting. It’s able to take a more determined approach with its inspections, collecting detailed measurements of features that are difficult to measure, such as wall thicknesses and cross-sectional dimensions. The foundry can create cross-sectional views of a casting in a virtual environment without destroying a product in order to collect the data. One such cross-section showed wear that wouldn’t otherwise have been detected, and the inspectors discovered that a square corner of a frequently produced part had started to “round off.” Since wear reviews only require a certain number of dimensions, that corner had not been called out in the blueprint. The wear was not visible to the naked eye, but would eventually have caused problems during the machining process for Rochester Metals’ customer.
Usually, the Romer arm is stationed in the Layout department. However, its lightweight construction and magnetic base mean that it can be moved easily from the lab to the foundry floor. On the floor, the operators will check alignment on the machines that put patterns and molds together. This capability saves maintenance costs and ensures casting uniformity without shift. The arm’s thermal stability allows it to function in temperatures ranging from 0° and 50°C (32° to 122°F) with no warmup period or homing procedures. The operator simply turns it on and starts measuring.
Laser scanning gives Rochester Metal Products an improved method for communicating valuable information to its customers. The color map inspection reports show more than just a handful of dimensions: a complete view of the product can be seen. With over 2,000 different parts produced annually, the foundry’s customers will gain advantages too. “Now, we are able to see the entire footprint of the part instead of bestfit circles and planes generated from the CMM and portable CMM,” quality manager on Ron Spencer explained.
Interestingly, one stumbling block for Rochester Metal has been the novelty of the new technology. Customers are understandably apprehensive to trust a multicolored picture of their cast part, instead of more familiar inspection reports containing 2D linear coordinate relationships, part and probe information, and raw inspection data. However, the value becomes apparent once the buyers understand that hundreds of thousands (or even millions) of points document the thorough reliability of the finished product. At a glance, the picture tells them everything they need to know.
Cathy Hayat is a marketing specialist with Hexagon Metrology. She earned an MBA from Northern Illinois University and an undergraduate degree from the University of Wisconsin-Madison. Contact her at [email protected] or 847-214-5263.
