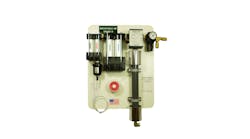
How it works: A small sample of the molten aluminum is taken from the melt and immediately placed under a vacuum dome of a Reduced Pressure Tester. The sample is allowed to solidify for approximately 7 minutes at 25 to 28 inches-Hg vacuum. Solidifying under vacuum expands the volume of hydrogen gas approximately 10X greater than solidification at normal atmosphere. This expansion of hydrogen porosity in the sample makes it possible to measure and evaluate various gas levels in the melt.
Visual comparison to gas chart – The most common method for evaluating the RPT sample is by sectioning the sample and comparing to a gas sample chart. A typical chart will display several photos of various cut and prepared RPT samples. Each photo will typically reference a corresponding specific gravity, density, density index, or percent porosity number. However, visual comparison also is the least accurate, least safe, and most expensive way to evaluate an RPT sample. To prepare the sample for visual evaluation, it must be cut in half, ground and polished, requiring labor and consumables. Once the sample is prepared, the comparison is a judgement call: different operators will report different results when comparing the same sample to the chart.
Specific gravity (density) – Specific gravity or density is a much better method. Very accurate results can be obtained in less than a minute. The RPT sample is simply weighed in air and weighed in water using a specific gravity apparatus. A calculation is performed using the two weights to determine the density of the RPT sample. Typically, a foundry will assign a target density number to an alloy or process that the operator must meet in order to ensure a low-porosity casting.
For example, the book density of 356 is 2.68, which is the specific gravity of a porosity-free sample. In this case, a foundry may assign a target specific-gravity of 2.6. If the RPT sample meets or exceeds the target (2.6 to 2.68), it is OK to pour the melt.
If the specific gravity of the RPT sample is below 2.6, too much gas is present and additional degassing must be carried out. Foundry-floor units, such as the Palmer PAS3000 and PAS5000 Porosity Analysis Systems will guide the operator through the weighing process, perform the calculations, and display the specific gravity (density) of the sample. In addition to making RPT an easy and repeatable process, these units will store or export the data for use with foundry quality control systems.
Percent porosity measurement – Percent Porosity is determined in the same way as the specific gravity/density test; however an additional calculation is performed using the RPT sample density and the theoretical maximum density of the alloy. Foundry-floor machines automatically provide this result along with the specific gravity (density) number for the RPT test sample.
Percent Porosity is helpful when multiple alloys are cast. For example, if a foundry casts both 356 and 319 alloys, they would need to assign a unique specific gravity target number for each alloy due to the difference in book density between the two alloys. 356 alloy has a book density of 2.68 while the density of 319 alloy is 2.79. In order to achieve the same low level of porosity, 356 would require a target specific gravity number of 2.6 while 319 would require a target number of 2.7.
Using a Percent Porosity target number instead of a specific gravity target number allows the same target number to be used for all alloys.
Brad Hohenstein is the president of Porosity Solutions LLC. Learn more at www.PorositySolutions.com
