Casting buyers demand precision in every detail — metallurgy, product dimensions, structural and surface conditions — and that level of quality control is important to metalcasting operations too, as a mark of productivity for their operations. Equally important, in some respects even more important, is speed: collecting the proof of precision is a race against waste. From the metallurgical labs to the quality control labs, to the customized non-destructive testing and validation operations that many foundries have built to conduct inspections according to an increasingly high level of customer expectation, the goal is not only total quality control, but also high-volume throughput.
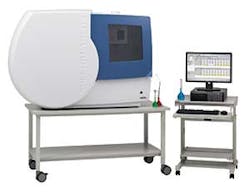
In foundry metallurgical operations, for example, identifying trace material elements is frequently necessary to determine the acceptability or performance of a production batch. Inductively coupled, plasma atomic emission spectroscopy (ICP-OES) is a process that will determine material composition, but how reliably? How quickly can the test be completed. Spectro Analytical Instruments put the emphasis on speed recently when it introduced a new high-resolution ICP-OES spectrometer, explaining its Spectro Arcos is first spectrometer with the option of quick selection of axial plasma or radial plasma observation in a single instrument, without any “optical compromise.” It also assured its industrial metallurgist customers that the new system would improve on “sensitivity, stability, and precision” in metal and material analysis, with lower operating costs and greater flexibility.
The developer emphasized that the Spectro Arcos “establishes a new ICP-OES performance class for complex analytical tasks,” resolving numerous inherent problems in spectrometer design: it performs both axial and radial plasma observation; uses CCD optics to offer high-res images; draws on a solid-state generator for the highest level of plasma power available; and requires no gas purging because the optical chamber is sealed. It also has an air-cooled interface so there is no need for external cooling, which reduces the equipment, power, and maintenance costs.
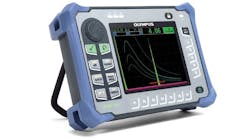
In the realm of non-destructive testing for cast materials, Olympus also put the emphasis on flexibility with its new Epoch 650 digital ultrasonic flaw detector: it combines conventional ultrasonic flaw detection capability with portability. Even so, the developer’s product manager for Ultrasonic and Phased Array Flaw Detectors, Coleman Flanagan, said: “This instrument makes inspections faster and easier than ever, and the flexible onboard reporting capabilities help all of our users communicate their results quickly and effectively.”
The Epoch 650 continues the development of flaw detector series launched in 2010, and covers numerous applications. Its user interface is appropriate for novice or experienced users, and its portability and rugged ergonomic design make it functional in nearly any inspection environment.
The compact Epoch 650 has two hardware configurations; a large, color transflective VGA display and a full screen A-scan mode, for either low light and bright sunlight conditions. A patented digital High Dynamic Range receiver meets the requirements of EN12668-1: 2010, and the instrument allows a full range of standard and optional flaw detection features.
Standard features include a 400-V tunable square wave pulser, up to 30 digital filters for enhanced signal-to-noise ratio, flexible reporting capabilities direct to removable memory, dynamic DAC/TCG, onboard DGS/AVG, AWS D.1.1 / D1.5 weld rating software, and Echo-to-Echo measurements with gate tracking. The Epoch 650 also has an optional corrosion module that combines the ease of use and measurement precision of a dedicated corrosion thickness gage with the functionality of a standard flaw detector.
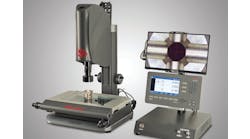
The most widely recognized quality-control function in foundries may be dimensional inspection, but even there, speed and flexibility are the driving factors. 3D laser scanning has spread at an exponential rate among casting producers, who apply it for reverse engineering as well as dimensional inspection of castings. According to Perceptron Inc., a developer of industrial coordinate measuring machinery and software, there are also metalcasters using 3D laser scanning to compliment 3D printing processes.
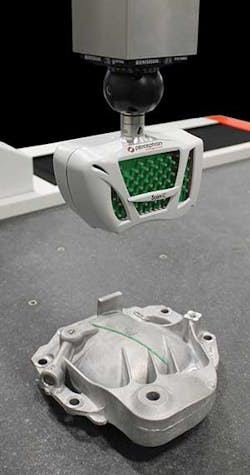
Recently Perceptron introduced a green laser-line metrology scanner, “the world’s first,” it said, for reflective materials like aluminum. No need to spray or coat the surface of the casting makes dimensional measuring of high-volume parts faster, thus more productive.
The ScanR CMM laser scanner reportedly solves many of long-standing application problems associated with laser scanning, and provides a wider dynamic range (more coverage of color spectrum and reflectivity; better material coverage; increased accuracy (a thinner laser line with higher signal-to-noise ratio; improved edge detection (sub-pixel optimization); and an adjustable data acquisition rate for HQ (high quality) and HS (high speed) operation.
The device also has a large field of view and depth of view, and is adaptable to any brand of CMM or PCMM. It laser and electronics are fully contained in the scanner head. By simultaneously simplifying the laser-scanning inspection process and expanding the range of its potential, the developer is appealing to manufacturers’ ongoing pursuit of greater quality control, and their need for speed.
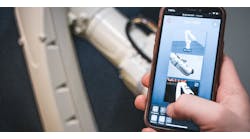
Of course, all of these new systems rely on metalcasters having some expertise in house to execute the testing and inspection processes. Speed and accuracy are priorities only if an enterprise already has the intellectual and manual resources to bring them to bear. If there is no expertise on-site, the answer is to outsource it. GE Oil & Gas released a new “remote collaboration software” called InspectionWorks Connect for the nondestructive testing (NDT) and inspection. The platform provides real-time access to live inspection video and data from anywhere in the world, which allows the manufacturer to make better decision, faster, and to improve the productivity of the inspector at the plant site. The software also will reduce training costs, according to GE.
Its experience with industrial equipment and inspection technology allows GE to claim it is singularly well suited to apply learning from across numerous industries and to drive innovation in critical inspection processes and technologies. This may be particularly relevant in NDT and inspection, where digitization is becoming increasingly important as part of information trends emphasizing speed and connectivity.
More than that, the availability of experienced quality inspectors and technicians is becoming less certain (due to retirement and ongoing budgetary prerogatives.) Technology, including InspectionWorks Connect, allows manufacturing organizations to improve the productivity of their inspection programs, with more accuracy and consistency, and with the additional advantage of short learning curves for inspectors.
“The NDT and inspection industry relies on accurate, real-time information to be effective,” stated Kermit Hoffman, GE’s general manager for Inspection Technologies. “Tools such as InspectionWorks Connect allow inspectors to harness the power of the Industrial Internet and make smarter decisions faster.”
