Finding dot-peen codes in cast-part surface is no challenge in industrial inspection and assembly process
At a Tier One automotive engine foundry, cylinder heads are marked immediately after casting with a dot-peen 2D matrix-style barcode for traceability. Locating those codes on each casting in a subsequent finishing process was a complex problem – one resolved by high-tech metrology.
Michigan-based Vantage Corporation develops and supplies automatic inspection and assembly systems for various manufacturing and assembly operations, like connecting rod gaging equipment, sorting devices for springs and other components, fuel-injector nozzle assembly stations, and cylinder bore inspection machines that measure roundness and surface profile, among others.
Vantage’s RTGC32 gage and cell control software is used along with vision and probe-based metrology systems for real-time monitoring and automation of various manufacturing processes. It is designed for easy integration to assembly and machining lines.
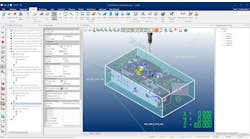
Late last year Vantage was contracted to design and build a dimensional test station to be placed at the end of the cylinder head machining line, one using a camera to read the barcode on the side of each casting, then collate the serial number found there together with the different part measurements for upload to a central database.
There was one problem: due to the castings’ rough surface, scanning the barcode was difficult. “It’s tough to read anything on a casting,” explained Nathan Ritter, controls engineering manager for Vantage. “Laser marking, dot-peen, or mechanical stamp, it doesn’t really matter: the irregular surface tends to scatter light in all directions, so you can’t see much when you view it with a camera.”
Ritter and colleagues knew from experience that proper lighting is necessary for any vision system, and is critical to consistent results. Until now, the best solution in these situations was to flood the area with spotlights, though that complicates the setup and spikes integration costs. Using supplementary lighting also can compromise speed. In this project, the cycle time for the entire measuring process was less than 16 seconds, so Ritter and company needed a way to read the barcode quickly, with no interruptions. They took the problem to Keyence, a sensors/vision systems/metrology developer that Vantage has worked with in the past.
Ritter was well aware of the Keyence product line and its reliable measuring technology. “We’ve used their vision systems many times on our equipment, and have integrated their laser micrometers and three-dimensional profile cameras as well,” he noted.
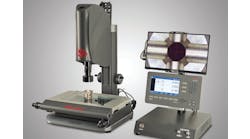
At the time of the cylinder head inspection project, Keyence had recently introduced its LumiTrax system that combines ultra high-speed CMOS sensors, partial illumination LED lighting, and advanced inspection algorithms to deliver an imaging solution that detects features, shapes, and text even on “challenging” part surfaces. In contrast standard imaging systems, which can be adversely affected by variations in ambient lighting and workpiece orientation, LumiTrax uses a high-intensity, multidirectional lighting source to capture up to 16 separate color or monochrome images, and then analyzes the relative brightness level at each pixel to separate irregularities from background surface patterns. The result is a system that quickly and repeatedly “sees” objects that in most cases are otherwise impossible to detect.
The Vantage team implements the LumiTrax system on the cylinder head line. According to Ritter, it was a straightforward project because the CVX controller and interface used on the new system is identical to other Keyence products.
And he was pleased with the results. LumiTrax easily identified the 2D matrix of the peened barcode, distinguishing it from the cast surface in perhaps one-tenth of a second.
“The LumiTrax system cuts through all the surface noise to give you exactly what you’re looking for,” he said. “I’m confident in the readings, and there was no need for any trickery with the lighting. Going forward, we’re going to use it for all our casting applications, and on any other parts where 2D imaging is a problem.”
