Laser Measuring Capability for Prototypes Improves Turbine Blades Performance
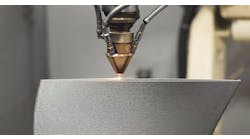
This measurement device use a concentrated light rather than a touch probe, overcoming inaccuracies such the cosine error.
Turbine blades are a product in high-demand from the powergeneration market — one of the most dynamic and growing segments of basic manufacturing. Serving that market demands a lot from turbine-blade manufacturers, and a new qualitycontrol capability is helping them do it. NVision’s (www.nvision3d.com) non-contact measurement services improve blade performance by increasing the accuracy of flow simulations used in the design process.
Blade manufacturers have had difficulty making accurate measurements of prototype blades — especially the leading and trailing edges — so could not be certain that physical tests matched simulations, making it difficult to validate the test results. NVision’s Maxos system measures the critical blade geometry ensuring the prototypes blades meet the design intent and enhance simulation accuracy.
Maxos is a non-contact, 3D scanning tool developed specifically for inspecting turbine blades. Most advanced turbine blades used in power generation are designed using computational fluid dynamics (CFD) to simulate the flow of gases over the blades. Simulation helps engineers to evaluate the performance of many different blade designs using virtual prototypes, quickly and inexpensively. But, before a CFD model can evaluate blade geometry it must be validated by running a physical test with an identical blade and operating conditions, to certify the simulation matches the test results.
Newer-generation turbine blades are highly complex designs, meaning it has been virtualy impossible with coordinate measuring machines (CMMs), laser scanners, or white light scanners to fully capture the critical geometry.
CMMs capture one datapoint at a time, and their touch probes are too large to measure very small fillet radii. Additionally, according to NVision, ball-offset geometry limits the ability to measure leading and trailing edges accurately. Also, conventional CMMs function ins three axes of motion, which may not allow enough coverage to access the entire blade geometry, including the root.
Laser and white light scanners capture a large amount of data, but they also have difficult defining a turbine blade’s leading and trailing edges with accuracy. NVision states that another problem for laser and white light measuring is the inability to measure machined or polished surfaces without coating them first, with a matte spray that varies in thickness between 1 and 5 thousandths of an inch, and also compromises the accuracy of the measured points.
NVision’s contract service division uses Maxos to measure with a concentrated light rather than a touch probe. It helps turbine-blade manufacturers to overcome inaccuracies inherent in contact probe measurement on small radii or sharp edges, caused by ball-offset geometry, aka “the cosine error.” NVision reports that Maxos can measure radii down to 0.004 in., and unlike other non-contact measurement systems it will measure actual surface material without the need for a matte coating. “The accuracy of the system is +/- 0.0004 in. on polished and machined services and the resolution between the measured points down to 0.0001 in.,” according to NVision.
It emphasizes that the accuracy of the Maxos non-contact measurement helps blade designers improve the performance of their product, but also that existing blade designs can be improved with more accurate measurement date. CFD simulations can be enhanced so that physical tests validate the simulations, all of which helps turbine blade manufacturers to optimize their products for higher levels of performance and lower quality-control costs.


