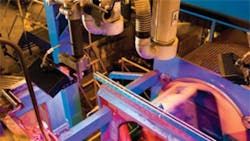
Automated Mold and Core Inspection
As the molding process technology advances to staggering rates of productivity — more than 400 molds per hour in vertical machines, and more than 300 molds per hour in horizontal systems — human visual inspection of these molds becomes difficult, if not impossible. It is extremely important for metalcasters to locate molding problems quickly to reduce the number of defects and avoid incurring additional expenses if bad molds are poured and later scrapped.
Fortunately, an automated vision system is now available that uses “shadow modulation” techniques to detect defects in the molding process. This system works with a series of flashing lights at various locations to create shadows. These shadows are captured by an overhead camera that detects even the smallest crack or break, and instantly transmit that information to a PC controller. Then, the computer will signal the operator about the upcoming problem, or stop the line until corrective action can be taken.
In a vertical molding line, because of the extreme speed of the line and the inhospitable environment in the blow chamber, it is not possible to use a series of lights. Instead, a spectrum of red, green, and blue lights illuminates the mold simultaneously for single-image acquisition. The resulting 3D shadow information provides the ability to obtain three different lighting angles to satisfy the need for accurate shadow inspection.
The results of the vision inspection are so accurate that some foundrymen may wish to allow certain-sized defects to proceed without an alarm. For this reason, the system offers a “tolerance range” that can be adjusted according to the particular quality needs of the castings.
It is also possible to designate “areas of interest” to be particularly scrutinized by the system. These areas are locations in the parts that, in the past, have shown a tendency for defects to occur. This allows for greater emphasis to be placed on these problemprone areas.
Also, the system can be set-up in such a way as to include core inspection after the core is set in the mold. This secondary inspection will find core defects as well as placement inaccuracies. Such an inspection will require two or three systems: one to check the cope and drag mold and the other to check the mold after the core has been placed into it.
These economical systems have been designed to operate in the foundry environment by enclosing the optics in an “air wash” tube that keeps the dust from accumulating on the lens. It is a rugged system with excellent results achieved throughout the world. More information is available from Foundry Solutions & Design LLC.
Contact tel. 770-667-4545, or visit www.foundrysd.com
