Latest from Purchasing and MRO
Admit it: there are times when you think you’re responsible for maintenance and repair in your workplace. That’s not unusual, given the multi-tasking ethic that has infiltrated every job sector, but if you pay attention to product quality or equipment performance, the reliability of a process or the condition of production equipment is something that concerns you.
At the same time, inspection, control, and analysis devices are trending in line with every other technology toward individual use and user-friendliness. This means there are devices available to make you an effective maintenance technician, even if that’s not your job assignment.
And in a manufacturing operation there are any number of opportunities to pursue this new calling. Laser measurement is a widely applied industrial metrology method, for tasks like checking machine alignment, and because the devices for performing this are becoming more and more portable, the user-friendliness increases as a result. In a foundry, laser tracking can be used to line up a metalcasting process, to inspect molds for accuracy prior to casting, or to scan finished parts for quality assurance.
Last month Hexagon Manufacturing Intelligence introduced the Leica Absolute Tracker AT960-SR, a lower-budget version of its AT960 laser tracker and designed for applications with smaller measurement volume requirements that nevertheless require speed and accuracy.
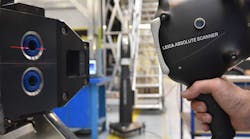
As an extension of the AT960 series, the AT960-SR is in line with Hexagon’s AIFM (“absolute interferometer”) technology for accurate high-speed measurement of moving targets; as well as “mini variozoom optical technology”, the AT960-SR gives maximum laser-tracking functionality, and still is fully compatible with Hexagon’s probing and scanning accessories, such as the Leica T-Probe, Leica Absolute Scanner LAS and the Leica T-Scan 5, and standard reflectors.
The AT960-SR will operate over a measuring volume of up to 10 meters diameter for “six degrees of freedom” (6DoF) measurement, corresponding to a measuring volume of approximately 400 cubic meters.
Daniel Moser, technical product director for Hexagon, said the new portable laser tracker is a response to customers’ demand for convenience and effectiveness in a single device. “There’s a wide range of scanning applications out there that demand high-level accuracy but don’t need the large measuring volume capability of the existing AT960 models. With the AT960-SR we’re delivering that, and at a correspondingly lower price,” according to Moser.
In spite of that apparent need, industrial operations of all types and scales are discovering they need more and more information about their products and facilities.
According to Dean Solberg, co-founder of Exact Metrology, the need for deeper data has many manufacturing firms applying CT imaging, or computed tomography, the process of using specialized x-ray technology to create detailed pictures, or scans, of areas within a mass. “Until recently, the technology of CT imaging was only available for use in medical settings,” Solberg noted. In recent years CT has been more widely adopted and is commonly used now in various industrial metrology applications, in the lab, online, or inline for product evaluation integrity assessment. “The main advantage is that it allows the inspection of a part’s interior structure or a package’s closure functionality without causing any harm or destruction to the objects themselves,” Solberg offered.
Industrial CT scanners use the same type of technology as medical CT scanners, taking multiple readings from various angles and converting the CT gray-scale images into voxel-based, three-dimensional point clouds. Once the CT scanner generates the point cloud, a specialist can generate a CAD-to-part comparison map, construct a 3D model of the part, or reverse engineer the part, as necessary.
Industrial scanners can portray the internal structure of an object nondestructively, validating internal dimensions with accuracy, allowing comparison to reference models, and so forth. In metalcasting specifically, CT scanning can be used to collect data for evaluating material solidification problems in critical series castings.
One of the most common uses of 3D and CT scanning in industrial metrology is reverse engineering of an existing part or object, then creating an accurate replica via CAD. This technology is extremely useful, when you have a manufactured part or object, but not the original prints or design data.
Non-contact measurement is another effective application, for example to capture the geometry of existing objects by drawing data from laser-emitting 3D scanners. Contact measurement is another effective use of CT technology, to collect individual points relative to each other. Portable coordinate measurement machines (CMMs) are typically used to gather this date, as with articulating laser-tracking arms or more advanced laser trackers and photogrammetry units.
In addition to inspecting casting density or porosity, as mentioned above, 3D imaging devices and long-range scanners can be used in any sort of internal inspection of component parts. Or, it can be used to analyze structural conditions of large pieces of equipment, and to validate the dimensional accuracy and integrity of parts.
Industrial scanning equipment styles and sizes range from table-top units for labs up to industrial-grade floor models, for in-plant or in-process use, along with portable units.
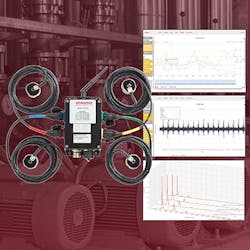
Laser and CT scanning are technologies for evaluating physical conditions of products or systems. Another function that is increasingly accessible to average users is condition monitoring. The Dynapar OnSite™ condition monitoring system “is changing what it means to track machine health,” according to its developers. The four-sensor device is designed to deploy quickly, and combines affordable, remote 24/7 condition monitoring with cloud-based analytics.
The developers also emphasize the CMS’ affordability, so that plant managers and engineers can make informed decisions that will maximize equipment availability.
“We are democratizing condition monitoring, making this powerful tool accessible to end users and third-party predictive maintenance providers,” claimed Ferran Ayala, marketing director at Dynapar. “Our customers asked for a practical solution to monitor their critical assets, their bad actors, and their hard-to-reach equipment.”
Dynapar OnSite CMS works with four sensors that each measure vibration along three axes, plus temperature. It also can connect to an encoder, integrating speed to enhance analytics and troubleshooting. The wireless system makes it possible to monitor virtually any asset of interest, like cooling fans, pumps, and gear boxes, as well as very high-value systems, like turbines.
The CMS hub is designed for rapid installation, so it can be effective even if installed temporarily to monitor a questionable asset prior to a scheduled maintenance shutdown. Anyone in the organization, or a third-party service provider, can quickly collect and evaluate real-time data from the equipment. More than that, this evaluation can be done from any location, on the plant site or remotely via the password-protected web app installed on a computer, tablet, or smart phone.
If an asset under evaluation begins to exhibit abnormal behavior, users will receive email alerts, thanks to a customizable alarming function.
Along with the CMS hardware, the Dynapar OnSite™ Analytics web app supports the work of licensed vibration technicians but is also accessible for use by a standard machine operator. It has simple, configurable dashboards and alarms as well as advanced diagnostic tools.
Plant managers and equipment operators often will find themselves in a situation when no greater expertise is available. Those are moments when the accessibility of advanced technology for monitoring, inspection, and analysis becomes more than a feature. It is the design purpose.
