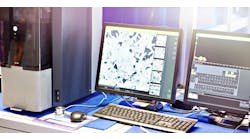
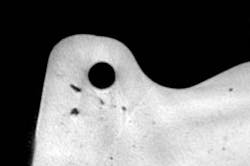
Perhaps we don’t need to target the precise moment and location of Computed Tomography’s (CT) arrival as the new standard for quality control in metalcasting, but we can come reliably close to certain about that point. Recently, once Josh Schradin placed a 12×6×6-in. aluminum casting within the lead-lined chamber of a GE v|tome|x 300 CT scanner, producers and buyers of castings were on their way to faster, more detailed data collection on complex cast parts. What happens next may scramble the acronyms of quality experts at foundries, diecasters, and the OEMs that buy their castings.
Widely known for its diagnostic capabilities in medical science, Computed Tomography is the process of collecting multiple x-ray images of an object, taken from different angles, and then assembled to produce revealing cross-sections of the object’s structure, and in that way revealing the internal conditions of the structure.
CT scanning is already used in quality control applications by some metalcasters, but to a limited extent: its effectiveness for non-destructive testing is obvious, but there are practical limits imposed by the size and alloy of the casting, the time needed to conduct a CT scan, and the risk/reward calculus of the casting’s commercial value.
Schradin’s CT scan project — conducted Exact Metrology Inc. for the OEM buyer of that aluminum casting — represented the first use of CT scanning for metrology in U.S. manufacturing.
Steve Young, the president of Exact Metrology, the supplier of comprehensive metrology services that is now offering the metrology-grade CT service, explained that the push to expand the scope of computed tomography is an effort to make an exceptionally advanced technology more practical for manufacturing operations. The first step in that effort is to get past the need to “scale” CT images in order to interpret the results for quality control.
In a standard CT scanning procedure, a part being inspected is fixed in place with a separate “artifact” that acts as a point of reference for the numerous images captured of the target object, images taken from different angles, distances, and perspectives, as necessary to reassemble a scaled impression of the object for structural inspection.
“The difficulty with scaled data is that it’s not linear,” Young explained, “so the deeper (perspective) images of the part are scaled differently than the closer ones.”
Metrology-grade CT systems are calibrated to evaluate collected data in the way that a coordinate measurement machine (CMM) does, so that when the device moves the data it collects be re-calibrated accordingly. Exact Metrology has such system now, and is the first to offer the capability in the domestic manufacturing market.
Schradin, the Exact Metrology technician who conducted the CT scan of the aluminum casting, noted that the customer was interested in the metrology as well as the structural quality of the part. “What this metrology-grade system gives them is the NDT results along with the CMM measurements, in one system, with one scan.”
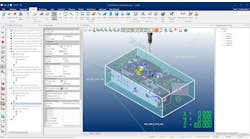
It went like this: the aluminum casting was placed on the rotating table in the scanning machine’s work space, or “box,” and oriented for optimal image collection. That orientation depends on the shape of the part, and the best angle of approach for the x-ray source to penetrate the casting with radiant energy. Then, sealing the chamber, Schradin initiated the process of “pumping” radiation through the casting.
The radiation is delivered in a cone-shaped field, so positioning the part closer to the radiation source will narrow its field of view. “A larger casting it will be positioned further from the source so it can incorporate everything necessary in one scan,” he said.
“And then, we adjust the settings of current and voltage to match the material, and to make certain we achieve the penetration we expect, according to the amount and type of material (or materials) involved with the part. We set up a plan for the number of images to be scanned, and hit start.”
Because the GE v|tome|x 300 is a metrology-grade CT scanner, its not necessary to place an artifact in the scan field, Schradin emphasized. The scanner interpolates the information needed to scale the object within the space, and calibrates its measurements to indicate the casting’s position in respect to the energy source. It’s no longer necessary to reposition the object with an artifact, collect additional reference scans, and run the calculations to incorporate the X, Y, and Z, references to scale the images accurately.
Asked how long such a procedure takes to complete, Schradin said the aluminum casting was evaluated based on three different scans, each one taking about 30 minutes to complete. The 90-minute series resulted in a summary report of the casting’s surface dimensions and porosity, about an hour later.
There are different factors to be weighed in the set-up and execution of the CT scan, factors that account for the density of the material (aluminum versus steel, for example), the size and shape of the casting, and so forth. These details will influence the time needed to complete the scan.
“Our issues are the amount of the material in the casting and the density of that material,” Schradin said. “So, depending on the strength of the scanner — the voltage, amps, and wattage – and on the size of the casting, different systems will be spec’d differently. That range indicates how much material and what kind of material we can penetrate.”
Exact Metrology’s new CT scanner is a 300 kV/500 W system that can penetrate roughly 6 or 7 inches of aluminum effectively.
He noted that even though the aluminum casting he scanned was overall was 12 inches wide, much of that was distance represented the hollow interior spaces, so penetrating about six inches of the part, from end to end, was no great challenge.
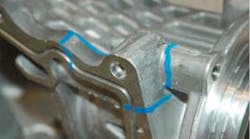
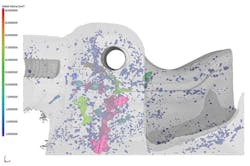
The OEM customer was interested in wall thickness inspection as well as the porosity of the cast material, and void analysis. Areas under stress, where leaking or breaking was suspected, were highlighted for inspection. Schradin’s scans helped to distinguish legitimate voids designed into the casting from areas where serious design or material problems may be occurring.
What this means for the future of casting inspection depends on the user: metalcasters, OEMs, and third-party metrology service providers will see different possibilities in the combination of CT and CMM.
Foundries will likely see significant advantages to the combo for their First Article Inspection objectives, advantages that will raise overall quality control in their casting processes.
Casting buyers may see possibilities for larger-scale examination of machined castings, coordinating their surface inspection with their product testing practices. Young referred to a European automaker that set up an in-line, conveyor-based process for CT scanning of all cast parts — up to 1,000 pieces per day, he estimated — a scale of inspection that would become even more valuable once the possibility of CMM is added to the calculation.
While the cost of CT scanning has been comparatively high for most foundries’ quality control efforts, Young noted there is an increasing level of competition among CT technology providers. That will likely reduce the cost of the system – and more than that, the availability of scanning devices that are more technically advanced, more functional, and more flexible. A combination of CMM metrology and NDT inspection would check all the boxes for anyone concerned about the quality, reliability, or value of their cast part.
