Industry 4.0. Big data. The Internet of Things (IoT). What does it all mean, and how will it affect the daily operation of manufacturers?
Production management has always relied on data; whether at OEMs, in contract manufacturing, or at job shops, there’s always a need to review the information on production. From analyzing the piece part consistency across a batch run to taking CMM measurements and comparing part dimensions to the drawing or CAD file, with subsequent adjustment to process control, this function has always been a necessary and vital aspect of engineered parts manufacturing, whether the output is nuts and bolts, tool/die sets, mold components, or turbine blades.
In the finishing process, such adjustments once were made by master craftsmen using handwheels, then NC punch tapes through a DRO. Now, it’s a programming function carried out via computer numerical control (CNC). Until a decade ago in most finish machining operations, the production data would be read and compared to the design, the manager would rush to the shop and stop the machine operator, bringing along a programmer to reset the parameters, check the tooling, re-calibrate the zero point, load the next blank and hit cycle start. Meanwhile, a lot of parts were scrapped.
In the past decade manufacturing technology seen everything from the emergence of PLM software, which blends the design and production software seamlessly with the actual output data; to the latest CNC that can integrate all the data in both directions and make the instant algorithmic adjustments to the cutting parameters of the cycle, to keep production as consistent as possible. In the process, these controllers take into account all the tool data, thermal expansion and machine kinematic information, because all of it impacts quality for the finished parts.
Enter “metrology,” which simply refers to the systematic and highly precise gathering of data in time and space. A part can be fixtured, scanned, and swapped out on a work table next to the machine or, in the most advanced production machining centers, in-process on the actual work table of the machine tool, using highly controlled robots for both part articulation and probing. Today’s CNC can even run these robotics on a second channel of the control, from a remote pendant, so the operator becomes both machinist and CMM operator simultaneously.
And so, now the fun begins. All these data points, which are gathered by the reflection of the light beam and captured in the software of the scanner, can be instantly sent over a communication bus to a host computer in the QC department. There, the points are compared to the CAD file, the CAM file is recalculated or the CNC can do it on the machine in-process (very new technology there) and the machine makes the very next part to the correct spec, altering the cutting parameters to offset the thermal or tool wear conditions or even the machine kinematics.
The very latest advancement in metrology is the introduction of the industrial CT scanner, where the internal geometry of a casting is examined, too. The data points here render an image that may be recognizable as a CT scan, so common now in medical diagnostics. By examining the internal conformation of a part, additional data can be gathered on why an identical tool might have a radically different impact on a material surface. Too much information? Not when we’re trying to anticipate the performance of a jet engine’s turbine blade at 38,000 feet.
Altering the Fundamental Interaction
Industry 4.0 seeks to alter the fundamental interaction between worker and machine. The integration of manufacturing, IT and cybersystems, including security, plays an expanding and evolving role in manufacturing, regardless of a business’ size or scale, or the types of parts being produced and processed.
Metrology doesn’t seek to alter data, but rather to enhance it, speed its collection and, most important perhaps, reduce and eventually eliminate scrap and downtime in a process by gathering the information and acting upon its significance in the most effective, efficient manner possible.
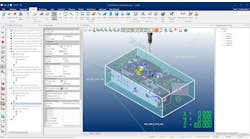
For example, a 3D scan can produce a dense point analysis for comparison of an “as machined” image to the “as designed” CAD file. The scanning software also can render what we call 3D CAD comparison and deviation plots, which are significant steps up from CMM or optical gauge capability. Conventional first-article inspection reports also are possible output from the scanning software technology today. Using the latter, also known as a 3D color map, which immediately visualizes the scanned object against the nominal design and is available almost immediately post-scan.
Over time, SPC data can be developed as color maps or simply detailed, tabular data to track the performance of production machinery in a preventive or predictive maintenance mode, as well as for OEE indexing.
Scanning modes vary: Laser scanners are typically mounted on a robotic armature with an optical scanning system, and can work in an area up to 18 feet in diameter and produce data at a rate of nearly 500,000 points per second
White/blue light scanners, mounted on a tripod or robot, capture more than 18,000,000 points per second. In a single shot, white light scanning can take measurements in an area from less then a square inch to several square feet.
CT scanning allows measurement of internal structures of parts by generating a voxel cloud from a number of two-dimensional x-ray pictures, which can be converted to point cloud data
Resolution on all these technologies is today as tight as 0.0005 in. Combined with the accuracy, which rivals all current CMM technologies, laser and white light scanning are perfect for micro to large machined parts. When the advantages of a portable CMM (PCMM) are needed, the laser scanner is simply replaced with a touch probe on the robot arm with optical trackers. This gives the shop the benefits of both high-density scanning and high-precision point measurement on the same part.
A last consideration in the rapidly advancing world of Industry 4.0 is cybersecurity. As manufacturing transitions from the open cloud to the closed cloud, the protection of your shop’s intellectual property will be vital and the metrology industry is watchful for the trends in this area, prepared to respond with proper safeguards on the big data that this technology produces.
Steve Young and Dean Solberg are the co-owners of Exact Metrology, a provider of 3D laser scanning, reverse engineering, quality inspection, and product development to manufacturers, along with turnkey metrology services, including equipment sales and lease/rental arrangements. Learn more at www.exactmetrology.com
