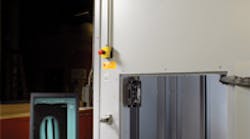
Digital Radiography: The newest inspection method to verfy integrity of ceramic cores
Core-Tech’s inspection device generates digital images of up to 11 × 14 in.
A recurrent issue facing all manufacturers is how to increase product quality and productivity. Compounding this challenge is that many manufacturers’ success relies on the performance of products that are manufactured by a supplier. When you’re the supplier of a component used in a manufacturing process, the performance of your product can be a critical element to your customer’s output capabilities. Ensuring the reliability of your product is essential to increasing a customer’s productivity.
For Core-Tech Inc., a manufacturer of precision ceramic cores for investment casting, defect-free cores are central to ensuring their customers’ productivity. But, producing high volumes of high-performance cores is only the first step to delivering reliable products. Inspection is probably the single most important post-manufacturing process.
Historically, techniques to verify the integrity of ceramic cores included visual inspection, tolerance measurement, and conventional film X-ray. Until recently, there was no electronic technique for inspecting the interior of ceramic cores to ensure they were free of microscopic cracks or defects. So, to add to their arsenal of inspection processes, Core-Tech installed a digital radiography unit to X-ray the ceramic cores produced at its two manufacturing plants.
It is believed that this digital radiography machine is the first of its kind to be used for product inspection by any coremaking operation. The unit is capable of generating digital images up to 11 14 in. for viewing on a computer monitor. These digital images also can be transmitted electronically to Core-Tech customers, to be approved before the finished product is shipped.
“We’re always looking for ways to improve our processes,” explained Jim Corbett, president of Core-Tech, “and this machine will allow us to detect any internal defects to prevent product failures in our customers’ production lines. Our ability to email the X-ray images to our customers will speed our rate of communication and significantly decrease any unseen interior defeats.”
By being the first to deploy the digital radiography unit for inspecting ceramic cores, Core-Tech will be able to verify that its components are defect-free. The ability to email the digital image of a product to a customer and have that customer approve the integrity of the product before a core is shipped will save time and money, and it will lead to increased production levels for their customers.
For more information, visit www.core-tech-inc.com.


