Latest from Testing/QC
Lighting Science is a Texas-based designer and manufacturer of LED lighting products – a growing market for aluminum and nonferrous diecastings, products that have both industrial and consumer applications. Keeping up with the extraordinary growth in the market has meant finding reliable ways to conduct product inspections.
The producer has adopted a handheld laser scanner from NVision to ensure the dimensional integrity of the complex castings it purchases and uses to assemble its roadway LED fixtures. In the past, inspections were difficult because the castings’ geometry was too complex for gauges and blocks. Programming a CMM and conducting the inspections in that way was too time-consuming and demanding.
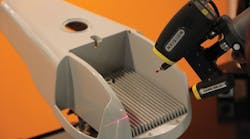
NVision Inc. develops high-accuracy, non-contact optical measurement systems and services for reverse engineering and inspection. The NVision HandHeld scanner is a portable device capable of capturing 3D geometry. The scanner is attached to a mechanical arm that moves about the object, freeing the user to capture data rapidly and with a high degree of resolution. An optional tripod provides complete portability in the field.
Intuitive software allows full model editing, polygon reduction, and data output to all standard 3D packages.
“With the NVision HandHeld laser scanner we can in about two hours, obtain the complete 3D geometry of a casting, and compare it to the design intent to determine not only if the part meets the design intent but also whether it is trending in the correct direction,” explained Richard Williams, Lighting Science manager, product quality assurance for.
The scanner is used to evaluate many of the company’s different LED solid-state lighting components. Its RoadMaste street light is one example.
The RoadMaster provides a reduction in energy costs during its extended operating life, helping municipalities and communities avoid soaring energy and maintenance costs associated with traditional high pressure sodium (HPS) street lights. The RoadMaster pays for itself by avoiding just one HPS lamp replacement, let alone the 4-6 traditional street light changes it is expected to avoid over its rated life.
The Roadmaster fixtures are constrcted with 2X1-feet (LXW) aluminum diecastings. In the casting process, aluminum tends to erode the shape of the steel dies over time, so the design details of the finished castings gradually move out of tolerance. The steel dies used to make the castings typically last from 25,000 to 50,000 shots, so it’s critical for Lighting Science to inspect parts samples from suppliers, to ensure that they are within specifications.
But, because of the geometry of the parts it would take several days to inspect them with gauges and blocks. Using a CMM would take an estimated week to write an inspection program to cover each of the many design variations, and about four hours to inspect each part because of the large number of points that need to be touched one at a time to validate the 3D geometry.
With the NVision handheld scanners, inspectors quickly capture the complete geometry of a complex part.
“It takes the operator about one hour to scan the casting and generate a point cloud that completely defines its geometry,” Williams said. Then it takes another hour or so to convert the point cloud to a surface model and compare it to the design intent.
Next, the inspectors use NVision software to compare the as-built part to the design intent. The software highlights in green areas of the part that are well within tolerance, in yellow the areas that are on the high side of tolerance, and in red any areas that are out of tolerance. The information alerts the manufacturer when the parts are edging “out of spec,” so corrections can be made — and scrap can be avoided.
The NVision software allows the manufacturers to compare the scan data of parts against a CAD model. Comprehensive inspection reports including color deviation plots, GD&T, 2D dimensions, flush and gap, animations or application-specific dimensions such as turbine blade measurements are available as output.
